Who’s Who on Your Internal Team?
The contacts for your Customers and Vendors are vital pieces of information for your business. But what about your hardworking internal team? INDUSTRIOS Company Contacts functionality helps you define and manage your Internal Contacts and the roles they play within INDUSTRIOS.

Company Contacts are used to define and manage where internal resources can be assigned within INDUSTRIOS. A Vendor or Customer can have both Contacts and Internal Contacts. The Internal Contacts provide visibility to internal assignments and responsibilities.
Several Master Files are used to support Company Contacts. These Master Files are found under Administration | Product Group Administration | Master Files.
- Company Contact Status is used to determine whether a Company Contact is Active and available for assignment.
- Company Contact Type is used to classify the various types of contacts you have internally e.g. Project Management, Procurement, Graphics.
- Company Department is used to maintain the internal departments used to identify your internal contacts. This is different from the Contact Departments used to identify contacts at your Vendors and Customers.
- Company Job Title is used to create the Job Tiles you use internally to identify staff. This is different than the Contact Job Titles used to identify contacts for Vendors and Customers.
- There is a one to one relationship between INDUSTRIOS User ID and a Company Contact. The User ID must exist before the Company Contact can be created.
With these Master Files in place, you can create your Company Contacts in Administration | Product Group Administration | Transaction Processing | Company Contacts. Follow these steps to add a new Company Contact.
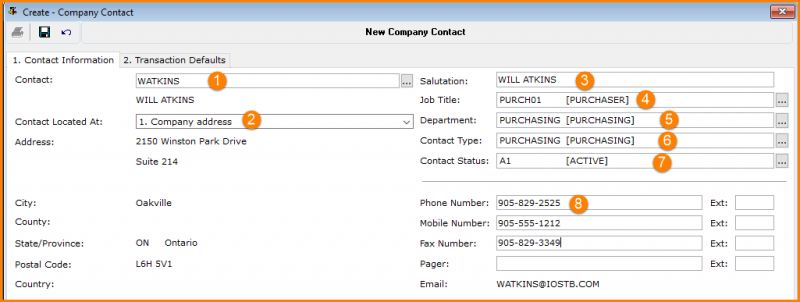
- In the Contact field, enter or lookup the related INDUSTRIOS User ID.
- If the Company Contact is located at a different address than the main company address, select ‘Different Address’ from the Contact Located At field and enter the contact’s address.
- Modify the Salutation as needed.
- Select a Job Title for the Company Contact from the list of defined Company Job Titles.
- Assign a Contact Department from the list of defined Company Departments.
- Assign a Contact Type from the list of defined Contact Types.
- Assign a Contact Status from the list of defined Contact Statuses.
- Enter any additional contact numbers for the Company Contact.
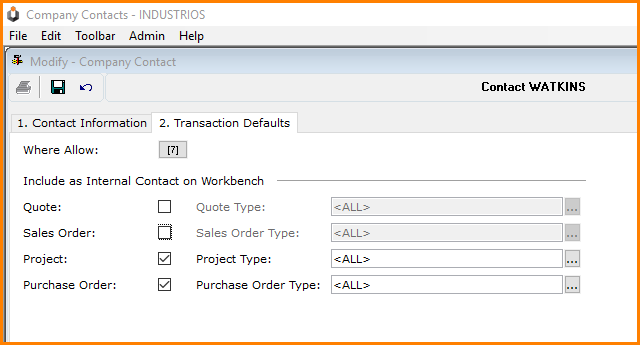
On the Transaction Defaults Tab, maintain where the Company Contact can be assigned and included as an Internal Contact on the various workbenches.
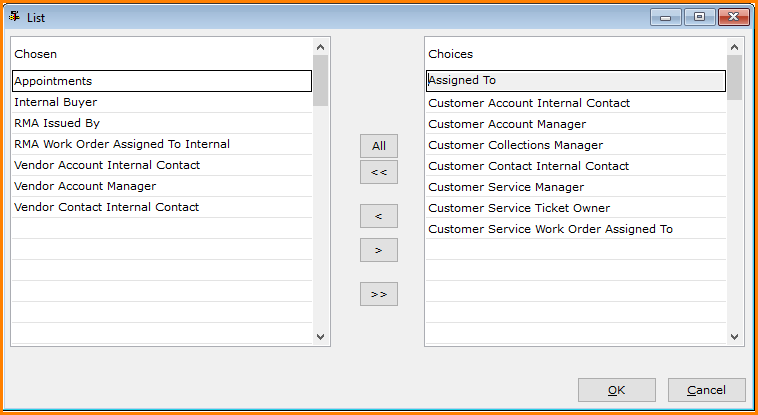
- Click on the Where Allow button to select where within INDUSTRIOS the Company Contact can be assigned: The list defaults to <All>. Use the arrow buttons to select from the choices displayed on the right.
- Finally, identify on which workbenches, the Company Contact can be selected as an Internal Contact. If necessary, you can further restrict the Internal Contact assignment by Transaction Types for the specific workbench.
Internal Contacts are assigned to Customer and Vendors via the Internal Contacts Tab on the respective workbench. When adding an Internal Contact, only those Company Contacts permitted for assignment based on the ‘Where Allowed’ settings will be chosen.


