IOS 101 – The Benefits and Uses of the Non Stocking Inventory Item
Every operation has them. Items that are not tracked as perpetual inventory but are of interest from a reporting and cost perspective. These are items such as shop supplies and items that use visual replenishment methods. The Non Stocking / Non Quantity Bearing Item Type fits these situations nicely.

By using a Non-Stocking / Non Quantity Inventory Item you can:
- Report consistently based on a defined item number versus freeform description
- Enforce GL expense account usage
- Avoid forcing items into the perpetual model and its associated transactions.
Here, is what you will need in place to use a Non Stocking Item: Item Type, Item Class, and Inventory Items.
Item Type
The assignment of a Non-Stocking / Non Qty Bearing Item Type is what designates an Item as not tracked perpetually. The quantities and costs purchased are recorded but there is no tracking of consumption.
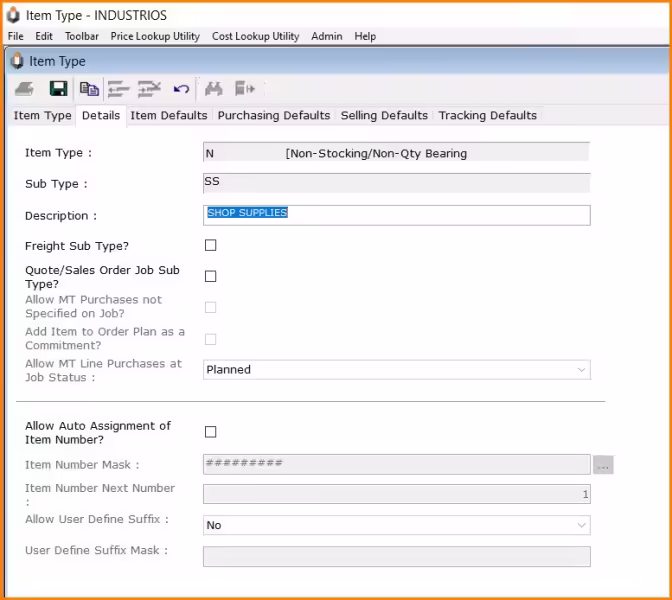
You need at least one Non-Stocking / Non Qty Bearing (N) – Item Type to create Non-Stocking Items.
Here, I have created an Item Type of NSS for Shop Supplies.
If you would like to have the Item Number auto-assigned when creating items, you can select that option in the bottom screen and assign a mask for usage.

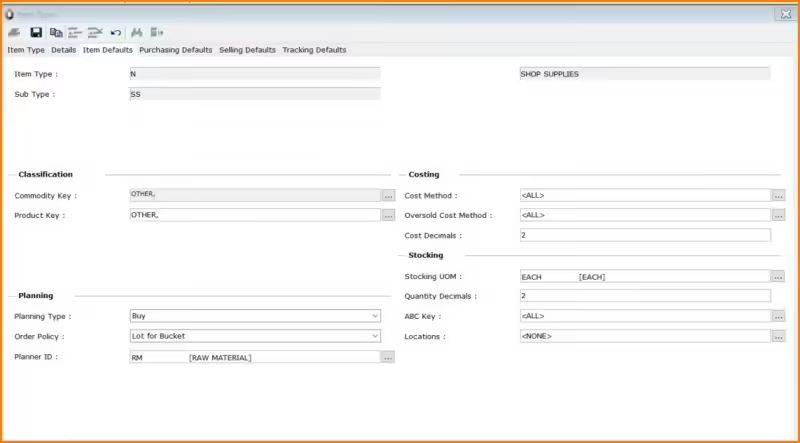
On the Item Default Tab you can specify Classifications for the Non Stocking Item Type. Commodity and Product Keys can be created specifically for N type items.

Item Class
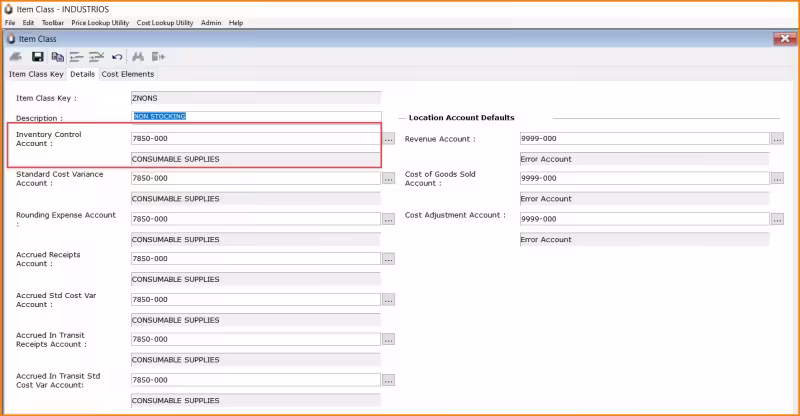
The Item Class controls the GL accounts used for the Item. In the case of the Non-Stocking Item, the purchase will go directly to an expense account. The Item Class can also be used to report on Non Stocking purchases separately.
You typically, only need 1 Item Class for Non Stocking. I’ve used a Z at the beginning of the Item Class name so that it’s easy to separate that class on reporting.
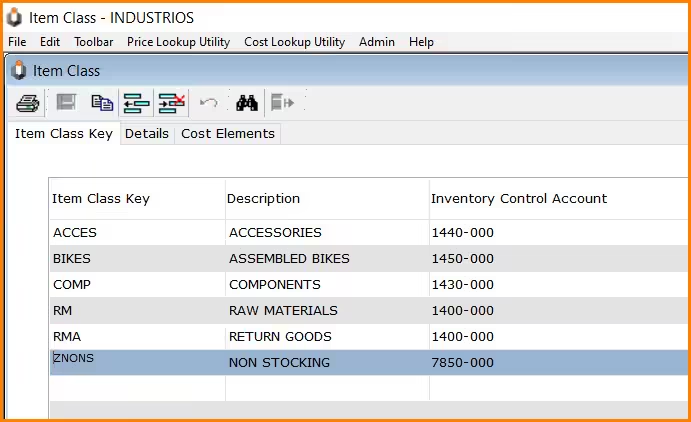

The expense account used for the shop supplies will be used as the Inventory Control account. That way, whenever an Item of this class is purchased, the GL account will default to this account.
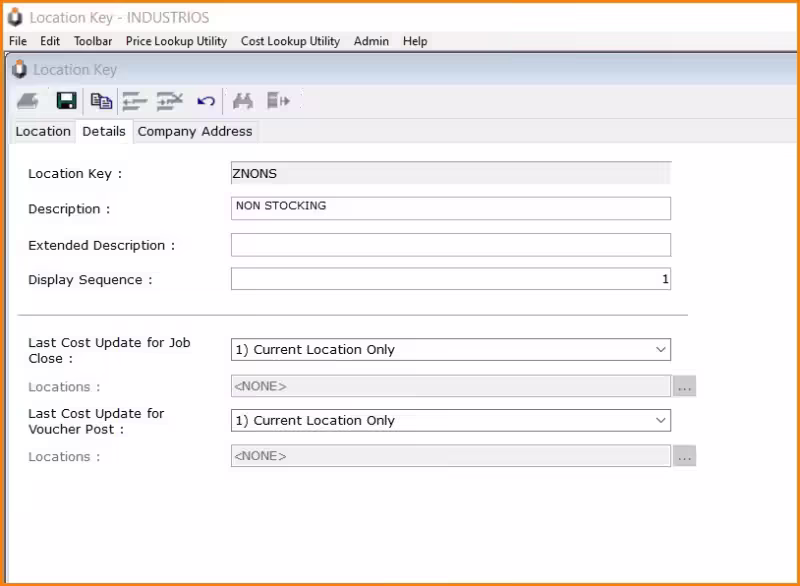
We also need a location. Following the similar naming strategy, I’ve created a ZNONS inventory Location, making it easier to exclude the location from report ranges.
Last step is to add the items to the Item Master. Fields default from the assigned Non Stocking Item Type. Note that the cost method is automatically set to Direct Expense. Stocking and Purchasing Details can also default from the Item Type.
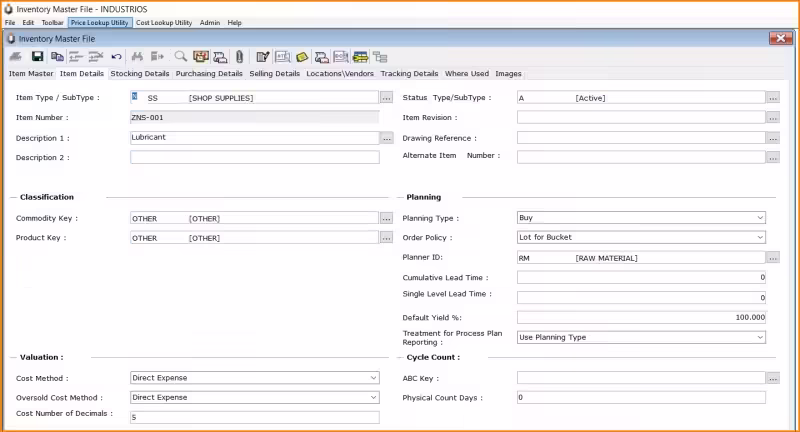
I then add the ZNONS location to the item on the Locations Tab. This assigns the ZNONS Item Class to the item. That’s it from a setup perspective.

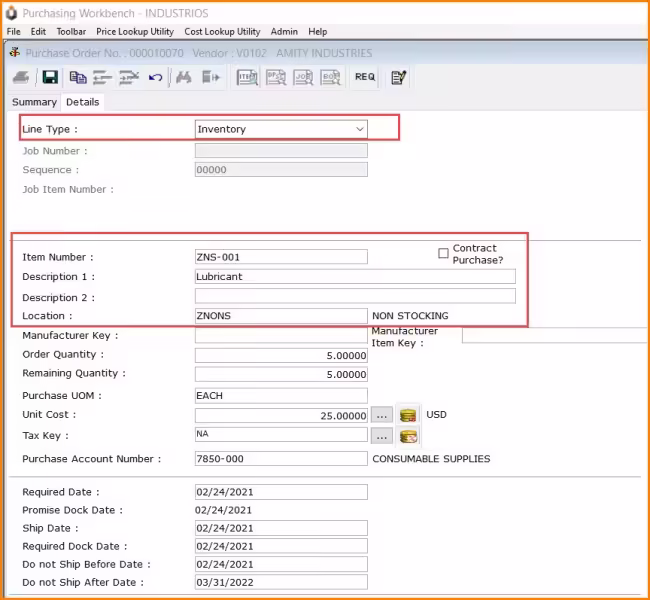
Here’s what it looks like on a Purchase Order. Select a Line Type of Inventory and then select the Non-Stocking Item.
The description, location and GL account all default on the line.