Super Charge Your Item Creation – Part 2
As we previously discussed in Part 1 of this series; when creating items in IndustriOS, the selections you make will determine if the related transactions and processes will run smoothly or grind to a halt. But, with so many different fields to select, and so many options, creating new items can be a daunting and time-consuming task. Part 1 of this series laid the groundwork for how you can optimize your item types to take the guess work out of creating new items.
However, you may be wondering, ‘what if I need to create or update a lot of items & quickly?’ Don’t worry, because IndustrIOS has you covered with our newly Enhanced Item Import and Creation Tools! This versatile new tool kit, along with your newly optimized item types, can take you from a list of items numbers in excel to a full list of properly configured Inventory Items in IndustrIOS, in no time. Furthermore, once you have configured these tools, you can use them over and over again, anytime the need arises whether you need to create one item or thousands of items.
This article will walk you through the initial set-up and configuration processes for the Item Import and Creation Tools in IndustriOS. Then we will explore how to use these tools to create new Items in IndustrIOS.
Are you more of a visual learner? We have you covered! We’re happy to announce that both Part 1 and Part 2 of this series have been made into video walk throughs. If you require a more in-depth explanation about any of the field in the Item Type Sub Type Screens, please contact our support team at support@stg-industrios-staging.kinsta.cloud, to request additional clarification and/or assistance.
Initial Set-up & Configuration for the Item Import & Creation Tasks:
To begin, we need to configure two separate External Systems Interface processes. The first process lets the system know how to interpret your csv import file as it imports your data into the Inventory Item Master Import Review Screen and the second process defines how the system should create the items from the review screen. Both of these tasks will first need to be configured in the External Systems Interface Configuration screen. You can navigate there from the main IndustriOS menu by selecting: Integration > External Systems Interface > Transaction processing > External Systems Interface Configuration OR by simply searching in the search bar.
Configuration Step 1 – Inventory Item Master Import Review Task:
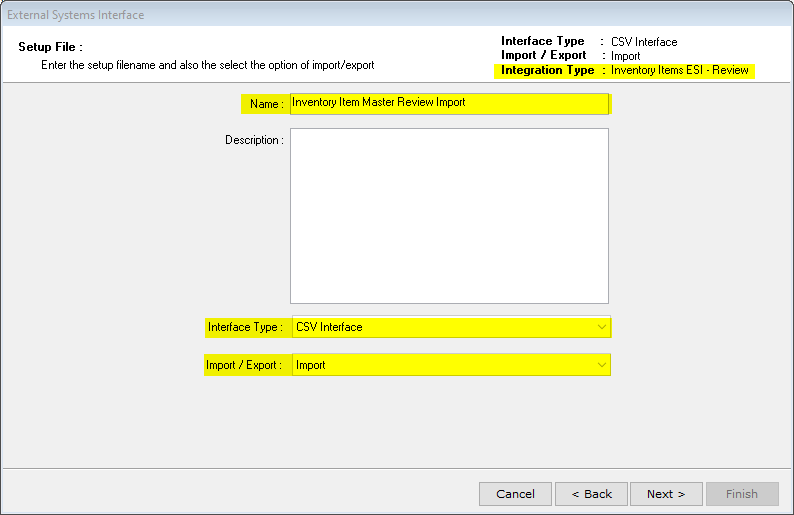
The first process we will configure is the Item Import task. Select the desired folder to add the task to, then select the ‘Create Task’ button, to launch the ESI Setup wizard. Select the Next button from the Welcome screen, then select the “Inventory Items ESI – review” Integration Type, followed by the Next button. Name the task, set the Interface Type to ‘CSV Interface’, set the Import/Export option to ‘Import’, followed by the Next Button (refer to the image below).

The available fields column contains an exhaustive list of fields that you may potentially desire to include in you CSV file. An IndustriOS team member can help you determine which fields you may want to include based on your circumstances. However, if you have performed the work to optimize your IndustrIOS Item Types, at a minimum you will want to select the following fields: IOS_ITEMKEY, IOS_DESC1, IOS_DESC2, IOS_ITEMTYPESUBTYPE, IOS_ITEMTYPE, IOS_ITEMSUBTYPE (refer to the image below).
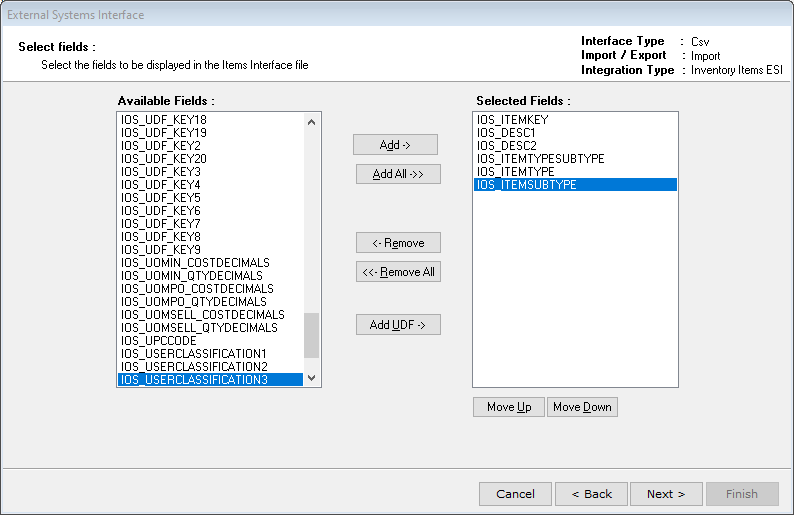

Each field selected in IndustriOS should be represented as a column of data in your CSV file, in the same order in which they are presented in IndustriOS (refer to the image below). After selecting the fields you need to include in your CSV file, select Next two times and then select Finish, to create the task. At this point, you can also prepare the data in your CSV file, now that the format of the columns and required data fields have been determined
Configuration Step 2 – Item Creation Task (from review screen):
The second process we will configure is the Item Creation task which will run from the Inventory Item Master review Screen. Select the same folder you selected previously to add the task to, then select the ‘Create Task’ button, to launch the ESI Setup wizard. Select the Next button from the Welcome screen, then select the “Inventory Items 2.0” Integration Type, followed by the Next button. Name the task, set the Interface Type to ‘Inventory Item ESI Interface (Review), set the Import/Export option to ‘Import’, followed by the Next Button (refer to the image below). Note: the screens for setting up this task will look very similar to the screens in the earlier steps, take care to make the proper selections.
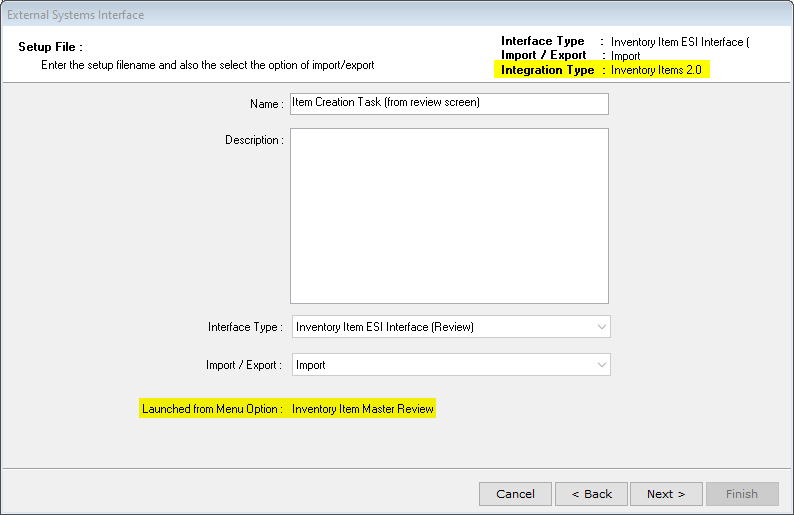
{File name – Image 4.png}
On the subsequent screen or this task configuration, we need to add all of the Available Fields to the Selected Fields Column. Then select the Next button twice, followed by the Finish Button, to create this new task (refer to the image below). This completes the initial configuration process.
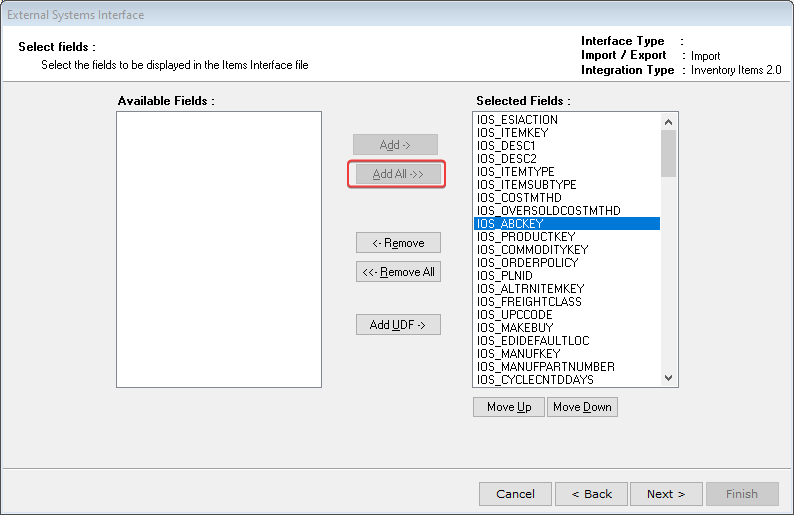

{File name – Image 5.png
Inventory Item Import and Creation Process:
The initial set-up and configuration steps above should only need to be performed once. The following steps can be followed repeatedly, as the need arises to create or update your items. Simply prepare your data in a CSV file, per the configurations you made in step one then tools you configured earlier can handle the rest of the process for you. NOTE: make sure you do not have your CSV open on your desktop, prior to moving on to the next step, the import will not function properly if you have the file open.
Import the Items form the CSV File:
From the External Systems Interface Configuration screen, select the Inventory Item Master Review Import task (created in step 1), then select the Post button, which looks like a green calculator. A Parameter and Routing Wizard window will appear on screen, select next twice until you see the screen in the image below. Check the box to indicate that the CSV File has a Heading Row, input the date mask, the input the file path for where you have your CSV file saved. Next you can save these parameter selections for future use. Finally select the Process button to import your item numbers. When the process completes, a report will appear on the screen to let you know the results of the import process. At this point you can exit the External Systems Interface Configuration screen & return to main menu.
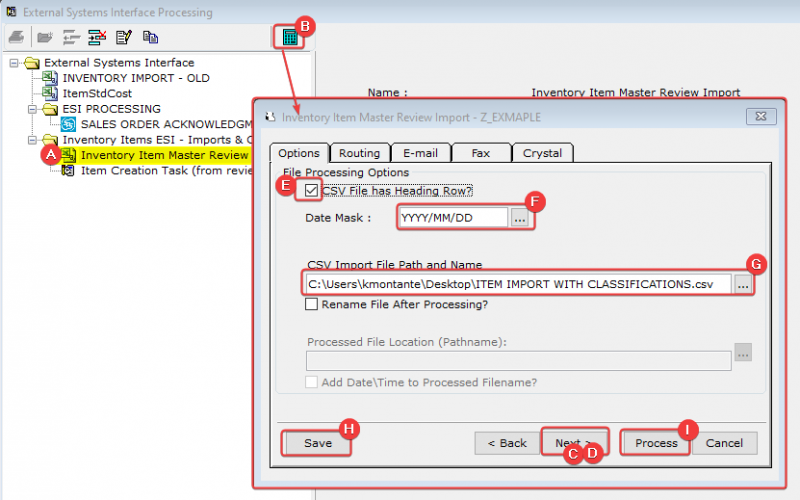
{File name – Image 6.png}
Create the Imported Inventory Items from the Review Screen:
From the main IndustriOS menu navigate to the Inventory Item Master Review screen menu by selecting: Integration > External Systems Interface > Transaction processing > Inventory Item Master Review. Once there, you should notice that all of the items you imported in the previous step appear on this Review screen. You can click through the items and the different tabs, to see the information that was imported so far, but it is not necessary for you to do so before moving on to the next step. When you are ready to create the items, select the Tag All button, and then select the Post button (green calculator). The Parameter and Routing Screen should display the task we created in Step 2 of the set-up and configuration process. Select the next button twice, until you see the screen below. Check the box to Create Items that do not exist. Select the Get Defaults from Import File using ItemType/SubType option. Make all Valid Items ‘Active’, and all Invalid Items ‘Inactive’, while allowing it to create Items with errors. Then check the box to Delete create and Update entries from the Import review screen. Select the Next button two more times, to advance to the next parameter screen.
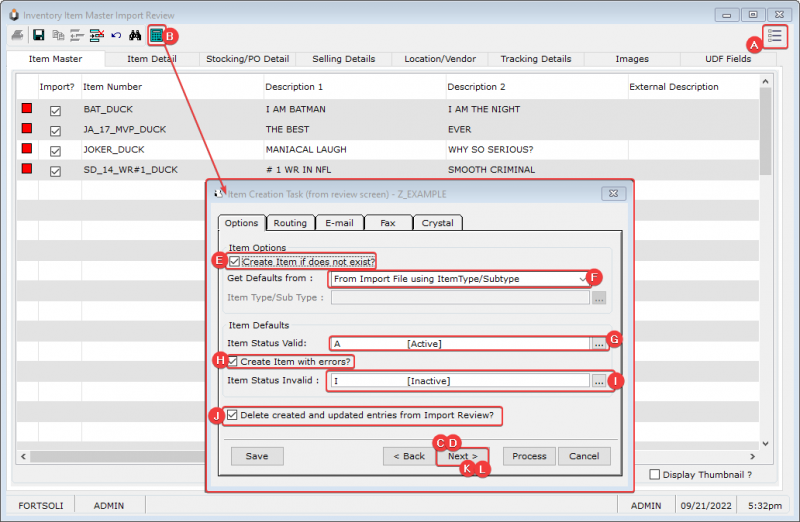
{File name – Image 7.png}
On this screen, set the Location status to Active. Choose your effective date for your Locations & set the Location Source to ‘From Item Type/ SubType’ (see the image below). Save these selections as a stored parameter for future use, and when you are done select Process to trigger the item Creation process. When the process finishes running a report will pop up to inform you on the results.
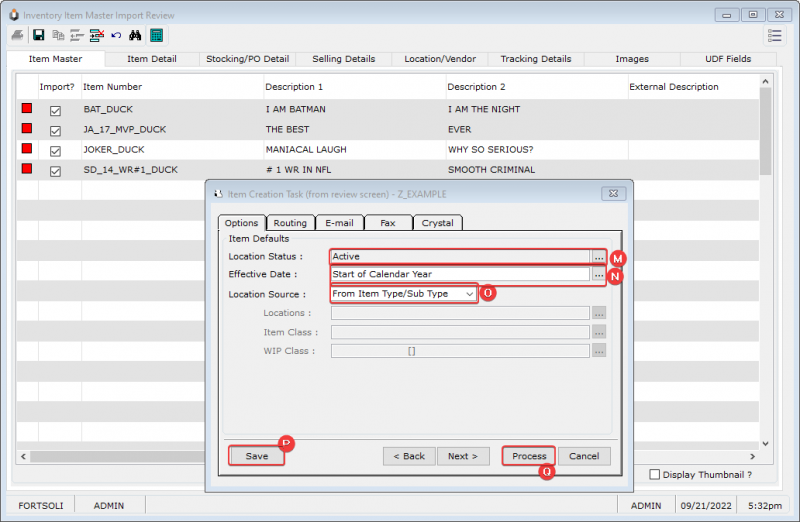
{File name – Image 8.png}
You have now exercised your new Item Creation Superpowers! If you navigate to the Inventory Master file, you will find that your fully configured new items are now available and ready for use. Once again, you can use these process you have configured over and over again, anytime you need to create new items. Whether you need to create one item, or one thousand items, this process can not only save you time but it will also ensure that your items are properly configured every time as well!
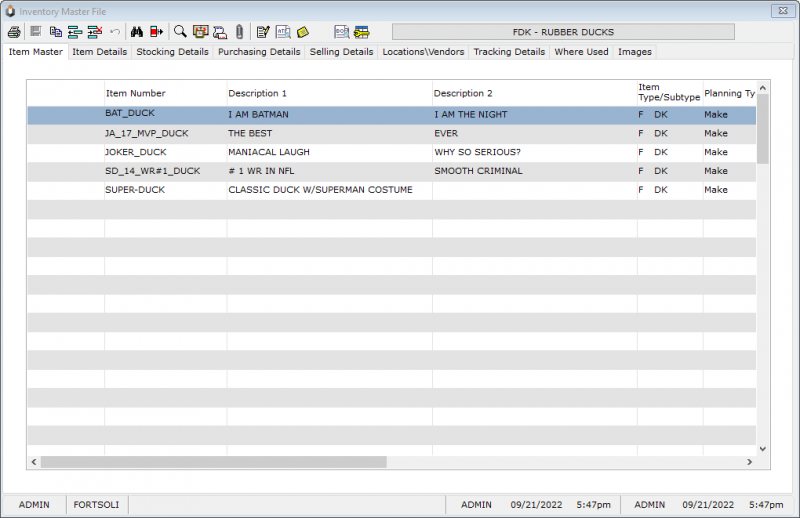

{File name – Image 9.png}