Rate Your Vendors on Timing and Quality with the Vendor Inspection Report
The Receiving Inspection Module – Vendor Inspection Report evaluates everything you hope for from your vendors – on time deliveries that also meet your inspection standards. Get to know this insightful report.

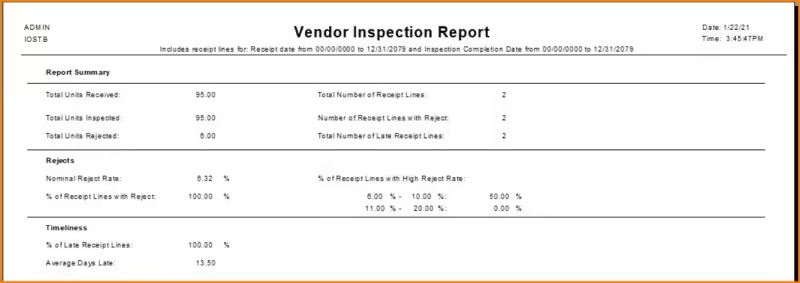
The Vendor Inspection Report provides a view of posted inspections that combines On Time delivery performance with inspection results. The report provides a barometer on inspections and includes metrics such as Nominal Reject Rate, Average Days Late, Number and % of Receipt Lines with Rejects and % of Receipts that fall within high defect ranges.
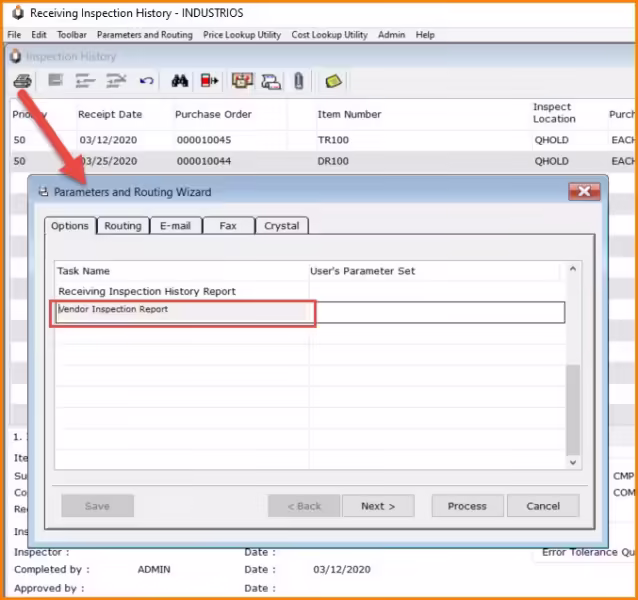
The report is launched via the Printer icon on the Receiving Inspection History Workbench.

The parameters and routing wizard provides selection criteria for the data selection and report formatting.

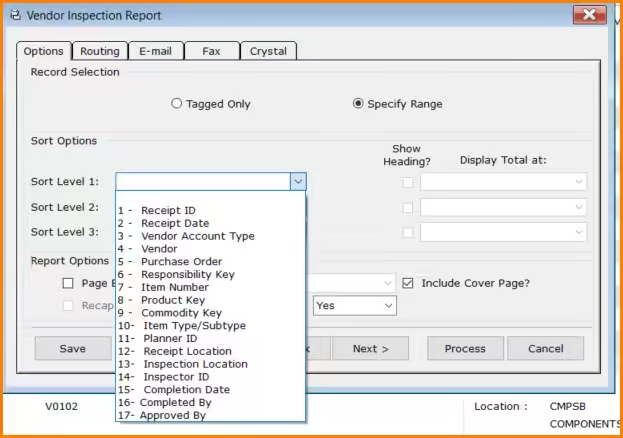
The report has many sort options available, allowing the report to match your area of focus.
Timeframe – (Receipt Date)
Vendor – (PO Number, Vendor Account Type, Vendor)
Internal Responsibility (Responsibility Key, Planner ID, Inspector ID, Completed By, Approved By)
Inventory Classification (Item Number, Product Key, Commodity Key, Item Type/Subtype)
Location (Receipt Location, Inspection Location)
The strength of the report comes from the Report Format Options.
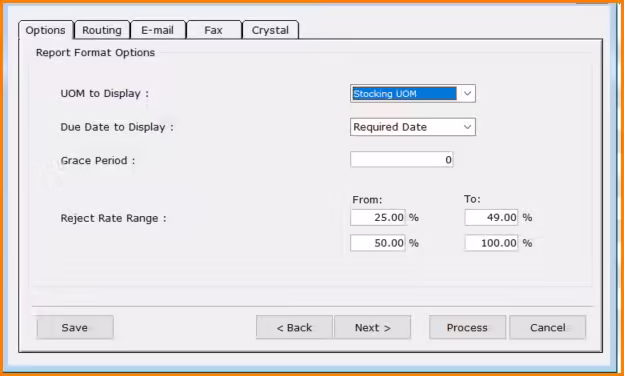

Here you specify whether you are calculating rejects in the Stocking or Purchase Unit of Measure.
You can also set whether the Receipt Date should be compared to the Required Date or Promise Date when calculating the number of days late.
Do you include a number of days as a Grace Period when considering On Time? If so, enter that number of days in the Grace Period field.
The Reject Rate Range allows you to specify 2 separate ranges that rejects will be compared against. These are meant to represent rates considered high for your operation. The report will indicate the proportion of inspections that fell into these trouble zones.
The rest of the Parameters and Routing is used to specify the range of inspections to capture in the report. This only appears if you selected Specify Range on the first screen.